One of the most important feature of Nagios is the notification system; by default Nagios will use the local mail daemon (mail) to send all the notifications.
Maybe this kind of system was working fine in past, but today, with this huge amount of spam circulating all over the world, this kind of emails from a not verified source can be filtered by the same company antispam system.
In order to avoid this issue I will explain how to configure Nagios using an external smtp server also with smtp authentication.
Since the Nagios notification event is still a triggered command, we have to download an alternative command line email client.
I suggest the powerful “sendemail” command, available at the following link:
http://caspian.dotconf.net/menu/Software/SendEmail/
Once the download is finished unpack sendemail:
[root@localhost] tar -xvf sendEmail-v1.56.tar.gz
Then copy the binary in the bin folder
[root@localhost] cp /root/sendEmail-v1.56/sendEmail /usr/local/bin/
In order to troubleshoot any eventual problem, please use the following workaround to create and give the necessary authorization to write in the sendemail log file:
[root@localhost] touch /var/log/sendEmail
[root@localhost] chmod 666 /var/log/sendEmail
(remember, by default, Nagios does not start with full administrative rights, so command sent by Nagios too)
Now we need to set some variables that we need to recall later depending on your particular environment and smtp configuration:
So edit the resource.cfg file located in:
/usr/local/nagios/etc/resource.cfg
Add the following lines with your particular smtp configuration:
$USER5$=email@address.tld
$USER7$=smtp.server.tld
#If you don’t use smtp authentication skip this variables and use the version B) of commands.cfg
$USER9$=authsmtpusername
$USER10$=authsmtpassword
Save and exit (<- This commands change depending from your editor, sadly I've been in too many disputes aboute which linux editor is better, so don't expect any advice from me) After this, we are gonna change the commands.cfg file located in:
/usr/local/nagios/etc/objects/commands.cfg
First perform a backup of the config file:
cd /usr/local/nagios/etc/objects/
cp commands.cfg commands.cfg.old
Edito the commands.cfg file and you will find two commands:
‘notify-host-by-email’ and ‘notify-service-by-email’
A) SMTP AUTHENTICATION COMMANDS
Now, if you use SMTP authentication replace the two commands with the following:
# ‘notify-host-by-email’ command definition define command{ command_name notify-host-by-email command_line /usr/bin/printf “%b” “***** Nagios *****\n\nNotification Type: $NOTIFICATIONTYPE$\nHost: $HOSTNAME$\nState: $HOSTSTATE$\nAddress: $HOSTADDRESS$\nInfo: $HOSTOUTPUT$\n\nDate/Time: $LONGDATETIME$\n” | /usr/local/bin/sendEmail -s $USER7$ -xu $USER9$ -xp $USER10$ -t $CONTACTEMAIL$ -f $USER5$ -l /var/log/sendEmail -u “** $NOTIFICATIONTYPE$ Host Alert: $HOSTNAME$ is $HOSTSTATE$ **” -m “***** Nagios *****\n\nNotification Type: $NOTIFICATIONTYPE$\nHost: $HOSTNAME$\nState: $HOSTSTATE$\nAddress: $HOSTADDRESS$\nInfo: $HOSTOUTPUT$\n\nDate/Time: $LONGDATETIME$\n” }
# ‘notify-service-by-email’ command definition define command{ command_name notify-service-by-email command_line /usr/bin/printf “%b” “***** Nagios *****\n\nNotification Type: $NOTIFICATIONTYPE$\n\nService: $SERVICEDESC$\nHost: $HOSTALIAS$\nAddress: $HOSTADDRESS$\nState: $SERVICESTATE$\n\nDate/Time: $LONGDATETIME$\n\nAdditional Info:\n\n$SERVICEOUTPUT$” | /usr/local/bin/sendEmail -s $USER7$ -xu $USER9$ -xp $USER10$ -t $CONTACTEMAIL$ -f $USER5$ -l /var/log/sendEmail -u “** $NOTIFICATIONTYPE$ Service Alert: $HOSTALIAS$/$SERVICEDESC$ is $SERVICESTATE$ **” -m “***** Nagios *****\n\nNotification Type: $NOTIFICATIONTYPE$\n\nService: $SERVICEDESC$\nHost: $HOSTALIAS$\nAddress: $HOSTADDRESS$\nState: $SERVICESTATE$\n\nDate/Time: $LONGDATETIME$\n\nAdditional Info:\n\n$SERVICEOUTPUT$” }
B) NO SMTP-AUTHENTICATION
This is pretty much the same but without passing the authentication triggers to sendemail:
# ‘notify-host-by-email’ command definition define command{ command_name notify-host-by-email command_line /usr/bin/printf “%b” “***** Nagios *****\n\nNotification Type: $NOTIFICATIONTYPE$\nHost: $HOSTNAME$\nState: $HOSTSTATE$\nAddress: $HOSTADDRESS$\nInfo: $HOSTOUTPUT$\n\nDate/Time: $LONGDATETIME$\n” | /usr/local/bin/sendEmail -s $USER7$ -t $CONTACTEMAIL$ -f $USER5$ -l /var/log/sendEmail -u “** $NOTIFICATIONTYPE$ Host Alert: $HOSTNAME$ is $HOSTSTATE$ **” -m “***** Nagios *****\n\nNotification Type: $NOTIFICATIONTYPE$\nHost: $HOSTNAME$\nState: $HOSTSTATE$\nAddress: $HOSTADDRESS$\nInfo: $HOSTOUTPUT$\n\nDate/Time: $LONGDATETIME$\n” }
# ‘notify-service-by-email’ command definition define command{ command_name notify-service-by-email command_line /usr/bin/printf “%b” “***** Nagios *****\n\nNotification Type: $NOTIFICATIONTYPE$\n\nService: $SERVICEDESC$\nHost: $HOSTALIAS$\nAddress: $HOSTADDRESS$\nState: $SERVICESTATE$\n\nDate/Time: $LONGDATETIME$\n\nAdditional Info:\n\n$SERVICEOUTPUT$” | /usr/local/bin/sendEmail -s $USER7$ -t $CONTACTEMAIL$ -f $USER5$ -l /var/log/sendEmail -u “** $NOTIFICATIONTYPE$ Service Alert: $HOSTALIAS$/$SERVICEDESC$ is $SERVICESTATE$ **” -m “***** Nagios *****\n\nNotification Type: $NOTIFICATIONTYPE$\n\nService: $SERVICEDESC$\nHost: $HOSTALIAS$\nAddress: $HOSTADDRESS$\nState: $SERVICESTATE$\n\nDate/Time: $LONGDATETIME$\n\nAdditional Info:\n\n$SERVICEOUTPUT$” }
Now the configuration is finished. Anyway, before applying the new configuration, run the following command to check for any error or mistake:
/usr/local/nagios/bin/nagios -v /usr/local/nagios/etc/nagios.cfg
If there are no errors, restart the nagios service:
service nagios restart
To troubleshoot the sendemail command run the following to check in the log file:
tail -f /var/log/sendEmail
Hope this post will be useful to you. If you have any troube or you want to suggest me a better system do not hesitate to write a line.
Regards
Daniel

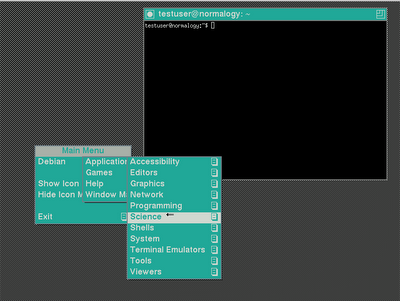 Has your GNOME desktop suddenly reverted to TWM upon a regular restart? If so, you aren’t alone.